How to Rollback System Drivers on Windows 10
If your system had been working correctly and began to malfunction after an update, rolling back the drivers might help. The rollback of the driver will delete the current driver installed in the system and replace it with its previous version. We have drafted three types of drivers: Audio, Graphics, and Network, with the explanation of the rollback method for each, one by one. Follow the respective method to rollback the desired driver type carefully.
How to Rollback System Drivers on Windows 10 Option I: Rollback Graphics Driver (NVIDIA) Option II: Rollback Audio Driver Option III: Rollback Network Driver
Option I: Rollback Graphics Driver (NVIDIA)
The rollback of the graphics driver should eliminate any bugs in the drivers and potentially fix video/display-related issues. Note: In this guide, we have compiled steps to roll back a common Display Driver which is NVIDIA. You are advised to roll back the incompatible driver on your device similarly. Follow the upcoming steps to know how to roll back NVIDIA drivers Windows 10:
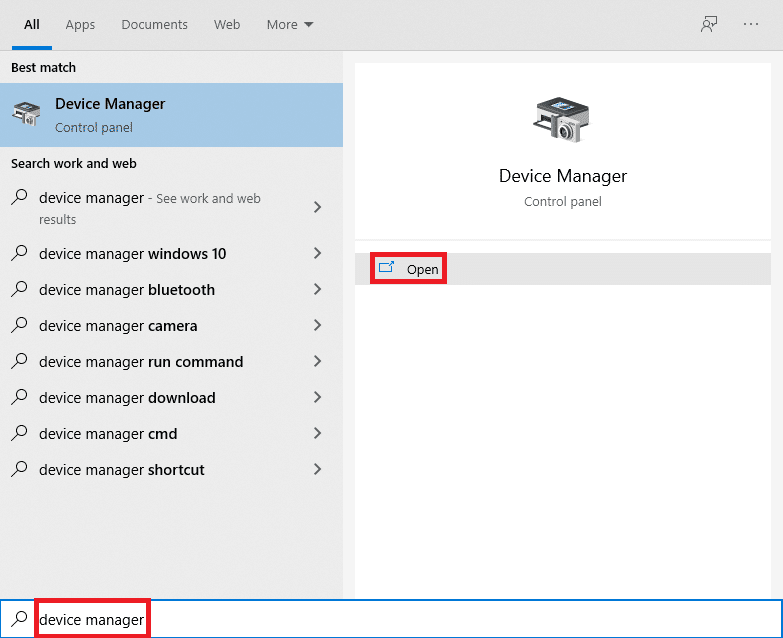
Hit the Windows key, type device manager, and click on Open.
Click on the arrow next to Display adapters to expand it.
Right-click on your display driver (e.g. NVIDIA GeForce 940MX) and select Properties, as illustrated below.
Switch to the Driver tab and click Roll Back Driver button shown highlighted. Note: If the option to Roll Back Driver is greyed out, then it indicates that your Windows PC does not have the pre-installed driver files or it has never been updated.
Provide a Reason for Why are you rolling back? in the Driver Package rollback window. Then, click the Yes button, shown highlighted.
Now, restart your PC to make the rollback effective. This is how to roll back NVIDIA graphic drivers on Windows 10. Also Read: What is NVIDIA Virtual Audio Device Wave Extensible?
Option II: Rollback Audio Driver
This rollback drivers Windows 10 process should eliminate any bugs in the audio drivers.
Navigate to Device Manager > Sound, video and game controllers as shown.
Right-click on the installed audio driver (e.g. Realtek High Definition Audio) and click Properties in the context menu as depicted below.
Go to the Driver tab, and click on the Roll Back Driver button in Audio Driver Properties window. Note: If the button is greyed out or not available, this means that you do not have any new updates installed for the respective driver.
In the Driver Package rollback, give a reason for Why are you rolling back? and click on Yes to roll back driver updates.
Restart your Windows 10 PC to have the appropriate drivers rolled back after system boot. Also Read: How to Rollback Driver Updates on Windows 11
Option III: Rollback Network Driver
Follow these steps to roll back network driver updates to fix the network connection issue.
Launch Device Manager as earlier. 2. Expand Network adapters by double-clicking on it.
Right-click on your network driver (e.g. Intel(R) Dual Band Wireless-AC 3168) and select Properties, as depicted.
Switch to the Driver tab and select Roll Back Driver, as highlighted. Note: If the option to Roll Back Driver is greyed out, it indicates that your computer does not have the pre-installed driver files or it has never been updated.
Provide your reason for Why are you rolling back? in Driver Package rollback. Then, click on Yes, as illustrated below.
- Then, click on OK to apply this change. Finally, restart your PC. Recommended:
How to Run Windows Update Troubleshooter Fix Computers Not Showing Up on Network in Windows 10 How to Rollback Driver Updates on Windows 11 Fix Windows 10 Update Pending Install
After following these steps, you learned not only how to roll back NVIDIA drivers on Windows 10 or other audio graphic ones but also perform the rollback driver on Windows 7 easily.


